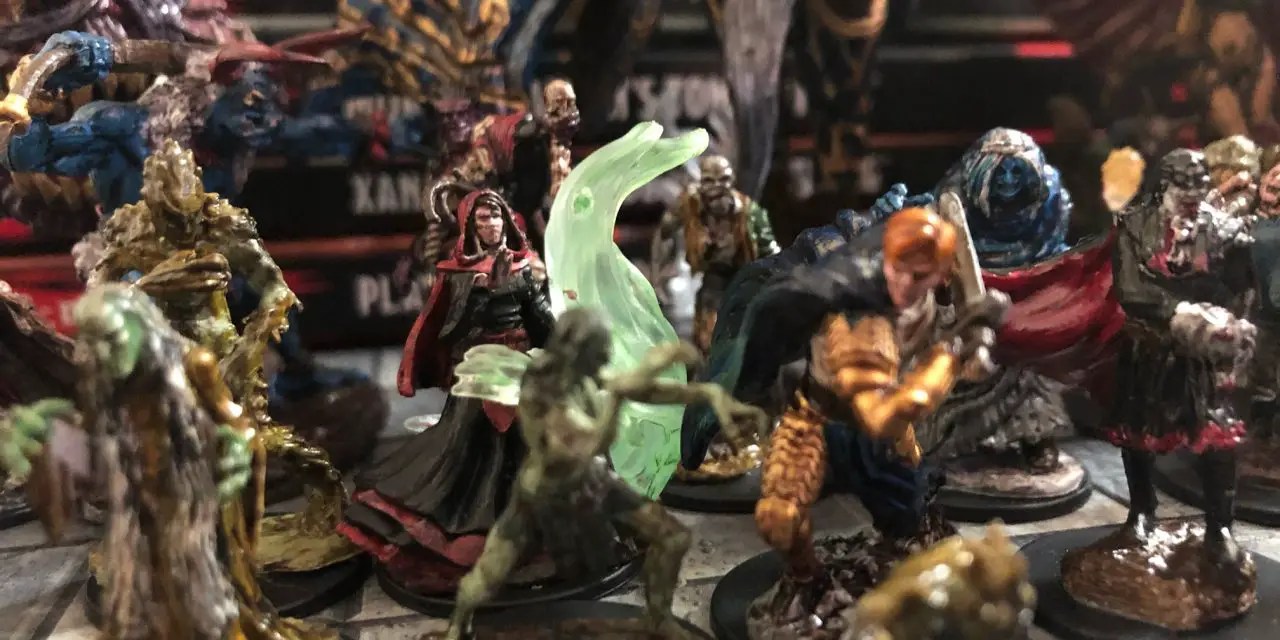
With 2020 being the stressful year that it was for everyone, I found myself picking up a new hobby: painting D&D miniatures.
Getting Started – My Story
It’s something that I had always wanted to get into, but I was always so worried to start. I have a major tendency to overthink things, which meant that the questions would start popping up every single time I considered jumping into the hobby.
“What if my miniatures turn out awful?”
“What if I get all of the supplies, but can’t paint well? Now I’ve wasted time and money!”
“Will my group laugh if I put down my own painted miniature at our game?”
I spent countless hours browsing Pinterest and Reddit looking at the amazing miniatures that people have painted.
The irony wasn’t lost on me that I was looking for inspiration, but ended up psyching myself out…
“I’ll never be that good!”
But I needed something to do during the craziness of 2020. I needed an outlet to help calm me down and I hadn’t yet seriously considered starting this blog.
Just Start Painting!
I decided to take the leap and found an incredibly fun hobby that adds so much extra “oomph” to my games. Not only do I love being able to use miniatures that are uniquely my own, it’s also helped inspire several encounters for my players.
I mean… Of course I’m going to build an entire encounter around my latest finished miniature. Wouldn’t you?
I’m by no means claiming to be the best miniature painter in the world. However, I have found this to be a deeply interesting hobby (and great stress reliever).
I’ve learned a few things and found a process that really works for me that I would like to share with you.
I’m confident that this process will give you the framework that you need to start painting your own miniatures. Even if you have no clue what you’re doing and have never held a brush, you’ll be rocking in no time!
So let’s do it!
Here is how to start painting D&D miniatures (even if you have no clue what you’re doing!)

Recommended Gear for Painting D&D Miniatures
Your supplies are an incredibly important consideration for painting miniatures.
The simple truth is that not all paints or brushes are equal.
That said, you don’t need to go in expecting to drop a ton of money. When you’re just starting out, you don’t need the absolute fanciest brushes and what not that you can find.
But that doesn’t mean that you should just get the cheapest supplies you can find!
Cheap paints are irritating to work with and won’t take as well as paints made for miniature painting. Cheap brushes will fall apart and lose their form. Rather than getting a decent set of brushes that last, you’ll end up buying cheap brushes every other week.
You want to get supplies that are affordable, but that are good quality.
I obsessively researched and experimented when I started getting into painting miniatures. It took a ton of trial and error, but I’m pretty happy with the standard supplies that I keep.
So let’s check out the supplies that I use and recommend.
Unpainted Miniatures
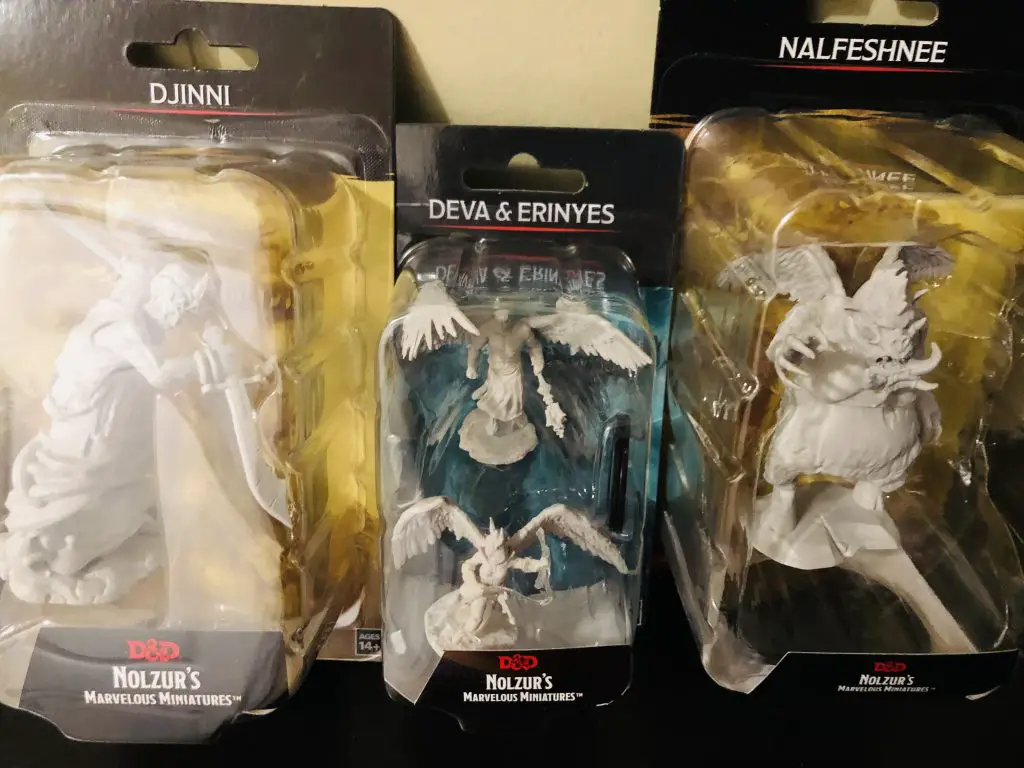
At any game store that sells supplies, you’ll find a ton of Nolzur’s Marvelous Miniatures.
Seriously, they put out a simply colossal amount of miniatures. I love the detail that they put in and they are perfect for beginners.
Whether you’re looking for monsters or heroes, these sculpts are great. Plus, most of the “medium” and “small” size miniatures come in multipacks which is very cool.
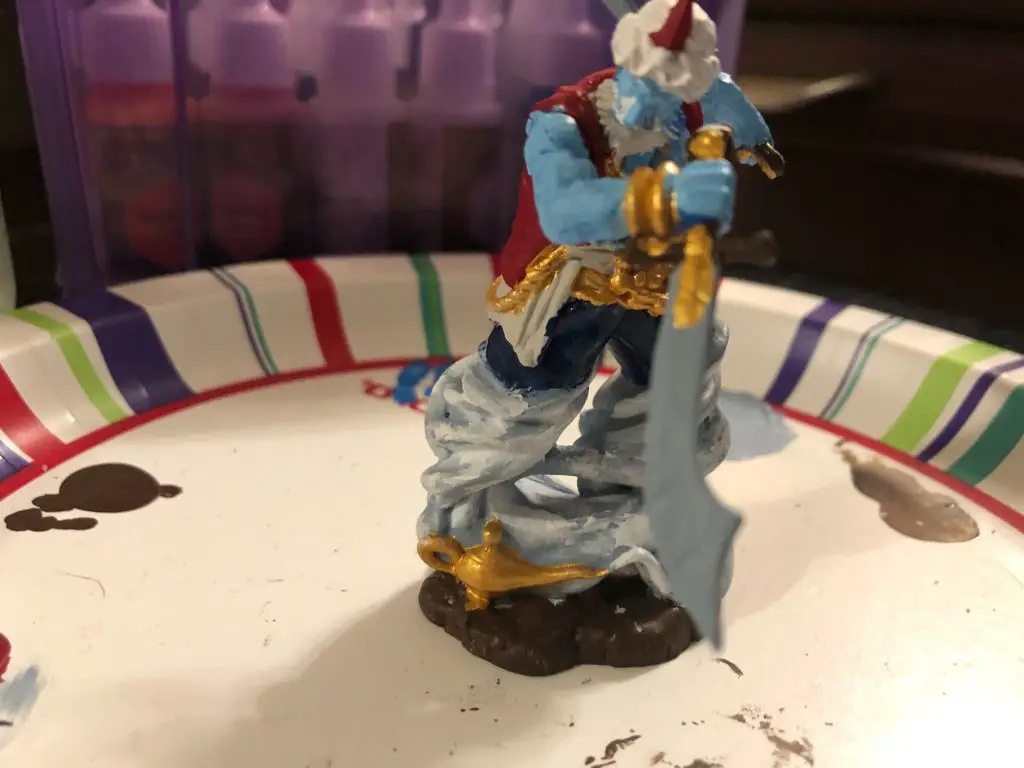
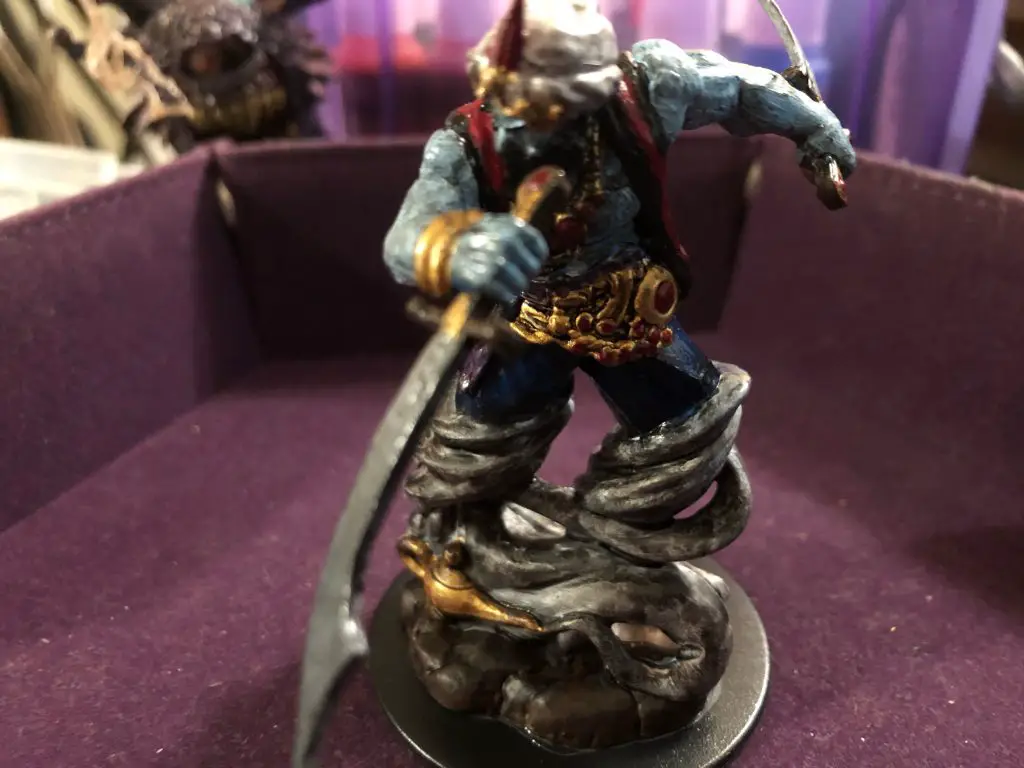
The majority of the miniatures that I’ve painted have been from the Nolzur’s Marvelous Miniatures line. I’m currently working on a Djinn (which you’ll see when we cover the technique in a bit) and just finished one of these two Aasimar Fighters.
I also like the Reaper Bones Black miniatures.
Many of their figures have very dynamic designs and I particularly like how hardy these miniatures are. If a figure warps, you can just put it in boiling water for a bit, straighten out the warped bits, put it in cold water, and you’re good to go!
Though the Reaper Bones Black line rarely seems to lose its form because of the heavier plastic that’s used. Not suprisingly, I’m very big on the durability of my purchases.
Brushes
I can’t tell you how many crappy brushes I’ve suffered through. But I can tell you that I found true love in Royal and Langnickel’s brushes. I’m eternally thankful to the lady at my local Michael’s for recommending them to me!
For the money, these are hands down the best I’ve used. The brushes keep their shape well and don’t fall apart while the rubber grip makes handling them super easy.
You can certainly get away with one of the smaller packs of these brushes like this one.
But, for beginners, I’d strongly recommend that you get this 12-piece set that also comes with a case. Because this set has such a wide variety of brush sizes, it should cover the vast majority of your projects.
Eventually, you will want to get some detail brushes to use. The brush included in the Royal and Langnickel set should serve you well, but you’ll want to get a wider assortment of detail brushes once you get more into painting miniatures.
A friend got me this 9pc set from OOKU for Christmas and I’ve really enjoyed it. The brushes are sturdy and comfortable to hold. It’s been great for getting better at doing the little detail work on miniatures!
You don’t need to really worry about getting a set of detail brushes right out of the gate unless you just really want to dive in. But as you start getting more into painting miniatures, you’ll definitely want to pick them up.
Paints
After the nightmare of trying to use some cheap acrylic paints I picked up from Michaels or Walmart or somewhere, I went back to visit my local game store.
The guy there really pressed on me how important it is to use paints that are specifically made for model painting.
It mostly comes down to the thinner texture of the paints which make them better for getting those smaller details without losing pigment. Your typical acrylic paints are generally made to be spread over a wide surface, not necessarily for doing small detail work like painting miniatures.
When it comes to paints, he was pretty insistent that you get what you pay for and recommended the Army Painter Warpaints line to me.
At this point, they’re all I use and I couldn’t be happier with the results.
The paints blend well, have a texture that’s easy to work with, and look fantastic!
Plus, I’ve painted 30-something miniatures at this point and have yet to run out of any color that I’ve purchased. A little bit goes a long way which means you’ll get a lot of longevity out of a single bottle!
Keeping Tidy
Last, but not least, you’ll want a few items to help you keep your space tidy.
No need to get fancy here. I literally just use a paper plate as a palette, a paper towel to clean up as needed, and a glass jar full of water for cleaning brushes.
You want to take care of your brushes and keep your cleanup to a minimum!
Setting Up Your Painting Space
Make sure that your painting space is clear so that you have plenty of room to work with.
You’re going to want to lay out your brushes and paints so that you can easily find what you’re looking for. Having to rummage through a storage box isn’t fun and can quickly lead to things getting knocked over and messes being made.
I learned this one the hard way. I spent nearly 5 hours on a miniature that I was painting only to accidentally knock it over. It fell onto my plate and all of the details were now covered in red and blue paint. I had no choice but to redo those areas.
You’ll also want to make sure that you have good lighting so that you can clearly see what you’re doing.
If you need, you can get some very nice LED desk lamps for a very reasonable price. I’ve taken to using this one from Miady and love it! It’s flexible, doesn’t block my work, and has multiple light settings.
Technique for Painting D&D Miniatures
So now that you’ve got your supplies and have a clear workspace to start painting, let’s get into the technique.
Generally, you can break the technique down into 5 distinct phases. We’ll go over these one by one to give you a framework for the process.
I don’t know that there’s necessarily a definitive “right” way to paint miniatures. At the end of the day, it should be a fun way to relax and create something interesting to add to your games.
Assembly
Some miniatures may require some assembly.
In general, very few (if any) of the miniatures from Nolzur’s Marvelous Miniatures or Reaper Bones Black require this. If they exist, I haven’t stumbled upon them yet.
To be honest, that’s one of the main reasons I like the lines that I do. I tend to be kind of scatterbrained and can easily foresee myself accidentally gluing the figure’s arms on backwards or something.
For plastic miniatures, use Plastic Glue. Personally, I use the glue from Gale Force Nine which should be readily available at your friendly local game store for about $5.
(Note: We’ll be using this glue again at the end of the process!)
If you’re working on models that must be assembled, you will also want to pick up a small file to help smooth out some rough bits.
Primer
Next, you want to apply primer to your miniature. This serves to help the paint we apply in the next step to stick better and to be easier to work with.
Because primer is specifically meant to go under paint, do not use a regular color spray. You can, however, use colored primer sprays. If you’re painting goblins, for example, you may opt to use a green primer.
You’ll want to do this outside in a well-ventilated area. If you’re using the same paints that I recommend and need to apply primer to a miniature, use The Army Painter Primer. I tend to strongly recommend staying with products from the same manufacturer so that you know it will work together perfectly.
However, if you’re painting a miniature from Nolzur’s Marvelous Miniatures, you don’t need to worry about this step. Nolzur’s minis come pre-primed so you can then get straight to the next step!
Basecoat
Now we’re ready to begin the basecoating step!
The goal here is to just apply flat colors. Things like highlighting and shading will come later.
I recommend setting out the bottles of paint that you will be using. Because the Army Painter paints have so much pigment, a little can go a very long way. Unless you’re working on a larger miniature (like a Giant) just a drop or two at a time on your palette should be fine.
(Important note: don’t forget to vigorously shake the bottle. You want to make sure that the pigment mixes well with the resin base of the paint before dropping any out!)
This is the step that you will spend the most time on. Don’t rush it!
Paint thin layers for your basecoat. If you lay the paint on too thickly, it will cover up the finer details of the miniature. Multiple thin layers (usually 2 or 3) is much better than one thick one.
If you need to thin a color (like if you’re painting something that’s meant to be semi-opaque), add a small amount of water to the color on your palette to thin it out. You can add water drop by drop until you get the desired consistency.
Give each layer ample time to dry. On most miniatures, I’ll finish one color’s basecoat and start with a basecoat somewhere else on the figure. By the time I’ve finished that section, the first area is usually dry enough.
Tip: Save Money, Mix Paints!
There are bottles of any color that you could reasonably need available for purchase. However, you don’t have to have a hoard of 60 different colors of paint of which you only ever use a handful.
Learning to mix colors will help you stretch your current paints and save you money!
Yet another reason that I love the Army Painter paints is that their bottles are great for this. You can just apply one drop at a time and mix the colors with a brush to get the desired color.
For example, you can two drops of white, one drop of purple, and one drop of red to get a brilliant pink. No need to go buy an entire bottle of pink paint simply because one miniature needed it!
Experimenting with color mixing can be a ton of fun!
Tip: Brush Size Matters!
When you’re painting on your basecoats, take care to use the right tool for the job.
A wide and flat brush can be used for large areas like a Nalfeshnee’s belly or a Cloud Giant’s cape. But you don’t want to try using it for smaller or tighter areas that require precision.
That’s why I so strongly recommended the brushes that I did when we were covering supplies. You want to have a variety of tools available. There’s nothing wrong with improvising in a pinch, but you’ll save yourself a ton of frustration if you have a variety of options!
Tip: Maximize Your Time!
Sometimes you just want to paint one miniature at a time and that’s fine!
Personally, I usually try to paint a couple miniatures at the same time if possible. If I know that one of the miniatures that I am using will require a lot of red paint, I look to see if I have any others that will also need some red basecoat.
It helps you not waste any paint while also maximizing your time!
Details and Shading
With your basecoats painted on and dried, you can now start working on the smaller details.
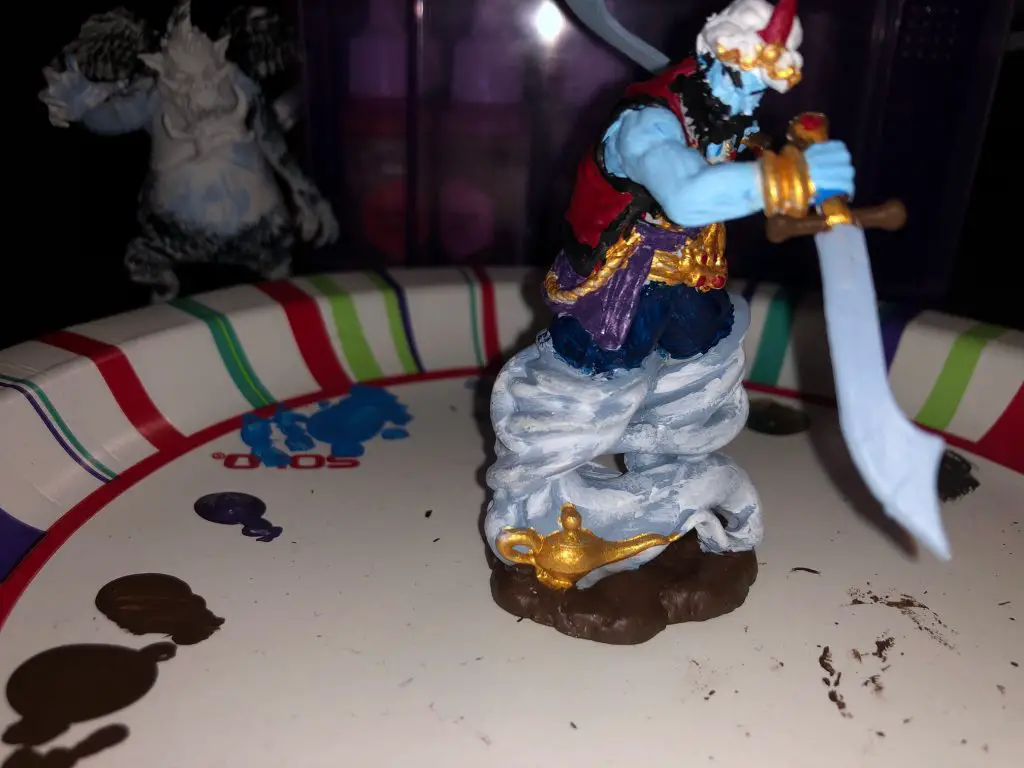
This is also when you can fix any areas where some of the color from one area accidentally got on another area. For example, some of the blue for my Djinn’s pants got on the smoke from his lamp. In this step, I just used my smaller detail brushes to tighten up the color and paint over the mistake.
Once you’ve finished your details and any touch-ups from the basecoat, we get to my favorite part: applying tone.
It’s simply incredible how much depth and detail a tone wash can add to a miniature. While there are many different tones in the Army Painter line, I most heavily rely on the Strong Tone.
I’ve had several miniatures that I’ve spent hours painting only to look at them like “meh.” But a quick application of tone and they just come to life!
When applying tone to your miniature, you want to lightly cover everything by brushing the tone on. A little bit goes a very long way, so go slowly and be sure to let the tone get into crevices such as facial features or the link in chain armor.
If you overdo it, it’s an absolute pain to fix. You can always add more tone, but it’s virtually impossible to take it away. Brush on a little bit at a time, make sure that you cover the entire miniature (so it looks uniform), and let it dry!
Varnish and Basing
Once your miniature has been shaded and given time to dry, it’s time to add some varnish.
This protects the paint on the miniature while also helping to finalize the look. Personally, I’m fond of using an anti-shine matt varnish. You can get it in a bottle (similar to your paints) or you can get a spray can. Unless you’re painting an entire army, I’d recommend going with the bottle.
Lastly, you’ll want to set the miniature on a base.
The Nolzur’s Marvelous Miniatures all come with plastic bases appropriate to the creature’s size category.
Using a plastic glue for the best hold, apply the glue to the underside of the miniature and carefully set it on the base. Press firmly and let it sit.
I’m not sure that the brand of glue matters terribly much, but I use the Plastic Glue from Gale Force 9. You can find it on Miniature Market, Amazon, or at your friendly local game store.
Conclusion – Painting D&D Miniatures
And there you have it!
I’ve found miniature painting to be a great way to relieve stress while also creating something special that can be added into my games.
As with anything, you’ll learn little extra techniques as you continue to practice. The most important thing is that you have fun with it!
Part of me is thinking that it may even be fun to start doing a livestream painting hangout at some point. I’ve found myself somewhat obsessed with painting D&D miniatures at this point.
Do you have some fire techniques that you’d like to share? Questions? Comment down below!


